ubuntu apache2 默认站点强制使用 https
好的,没问题。在 Ubuntu 上为 Apache2 的默认站点强制启用 HTTPS 是一个非常常见的安全实践。这通常意味着将所有来自 HTTP (80端口) 的请求重定向到 HTTPS (443端口)。
下面是详细的步骤和两种常用方法。
准备工作 (Prerequisites)
在开始之前,请确保你已经满足以下条件:
- 已安装 Apache2:
sudo apt install apache2 - 拥有一个 SSL 证书:
- 推荐: 使用 Let’s Encrypt 的
certbot免费获取。 - 测试/开发:可以自己创建一个自签名证书。
- 生产环境: 从商业证书颁发机构 (CA) 购买。
- 推荐: 使用 Let’s Encrypt 的
- 启用了 Apache 的 SSL 和 Rewrite 模块:
sudo a2enmod ssl
sudo a2enmod rewrite
sudo systemctl restart apache2
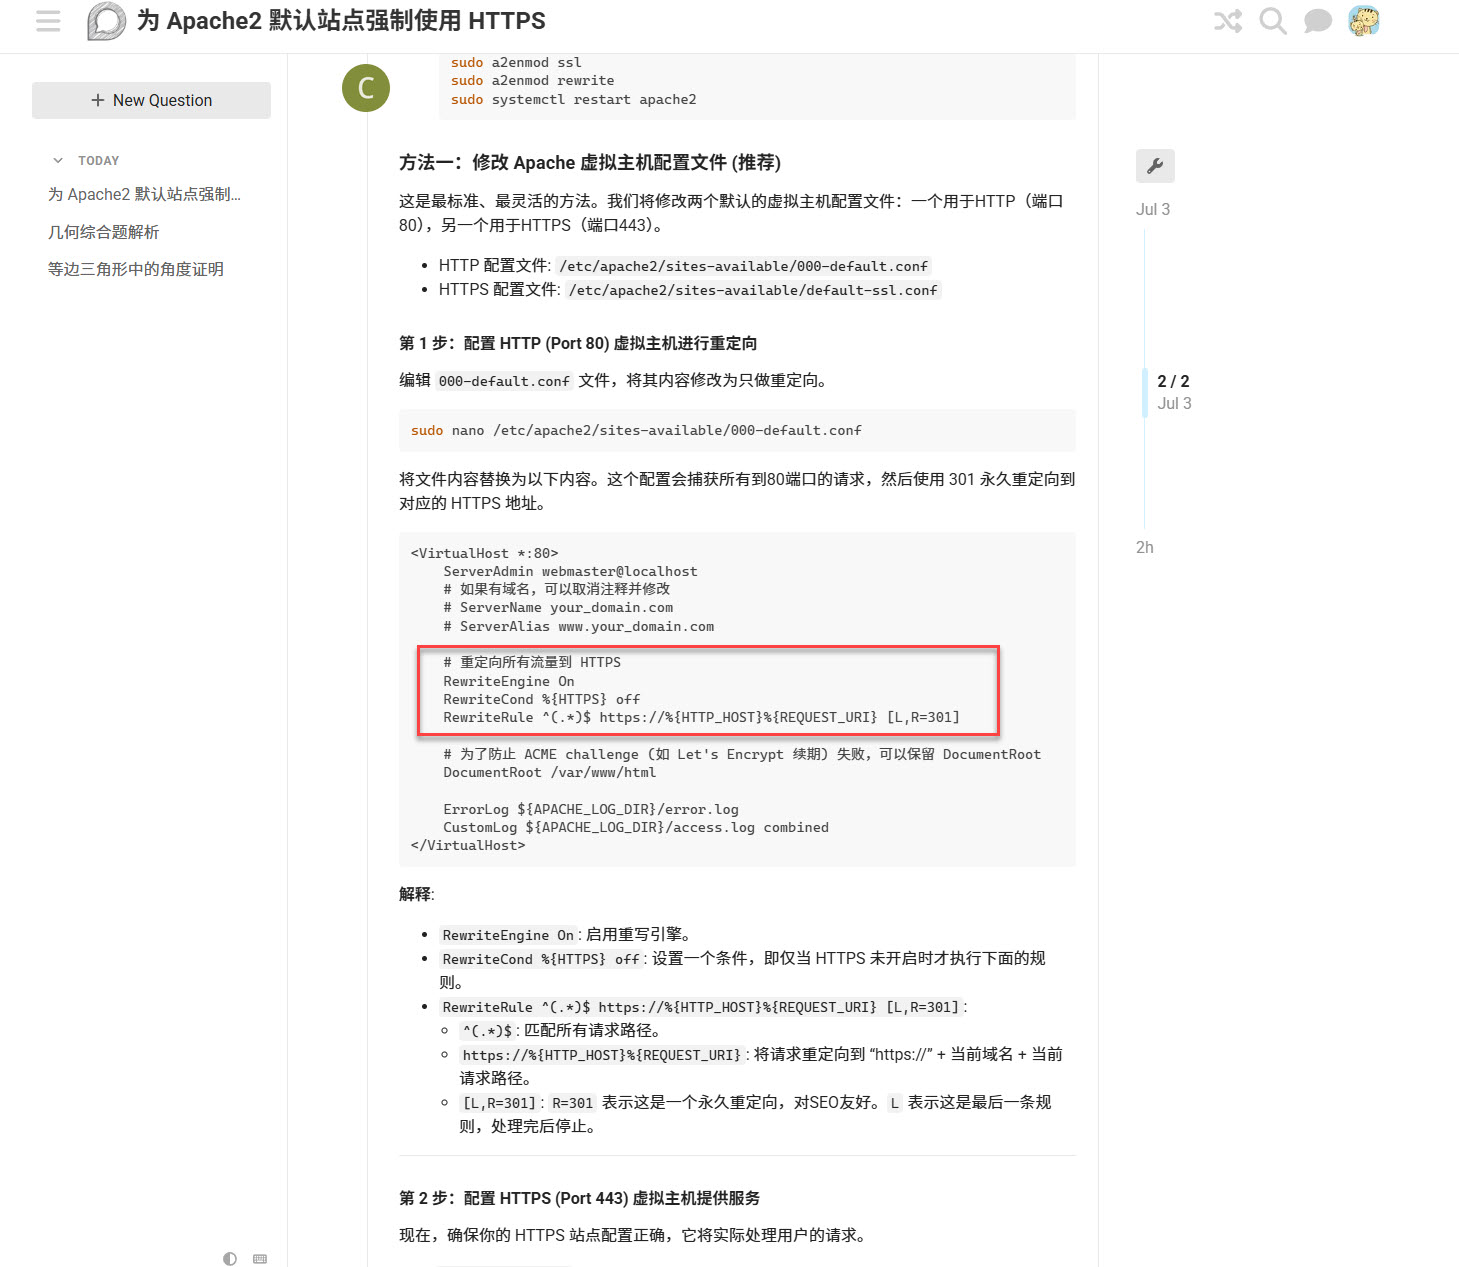
方法一:修改 Apache 虚拟主机配置文件 (推荐)
这是最标准、最灵活的方法。我们将修改两个默认的虚拟主机配置文件:一个用于HTTP(端口80),另一个用于HTTPS(端口443)。
- HTTP 配置文件:
/etc/apache2/sites-available/000-default.conf - HTTPS 配置文件:
/etc/apache2/sites-available/default-ssl.conf
第 1 步:配置 HTTP (Port 80) 虚拟主机进行重定向
编辑 000-default.conf 文件,将其内容修改为只做重定向。
sudo nano /etc/apache2/sites-available/000-default.conf
将文件内容替换为以下内容。这个配置会捕获所有到80端口的请求,然后使用 301 永久重定向到对应的 HTTPS 地址。
<VirtualHost *:80>
    ServerAdmin webmaster@localhost
    # 如果有域名,可以取消注释并修改
    # ServerName your_domain.com
    # ServerAlias www.your_domain.com

    # 重定向所有流量到 HTTPS
    RewriteEngine On
    RewriteCond %{HTTPS} off
    RewriteRule ^(.*)$ https://%{HTTP_HOST}%{REQUEST_URI} [L,R=301]

    # 为了防止 ACME challenge (如 Let's Encrypt 续期) 失败,可以保留 DocumentRoot
    DocumentRoot /var/www/html

    ErrorLog ${APACHE_LOG_DIR}/error.log
    CustomLog ${APACHE_LOG_DIR}/access.log combined
</VirtualHost>
解释:
RewriteEngine On: 启用重写引擎。RewriteCond %{HTTPS} off: 设置一个条件,即仅当 HTTPS 未开启时才执行下面的规则。RewriteRule ^(.*)$ https://%{HTTP_HOST}%{REQUEST_URI} [L,R=301]:^(.*)$: 匹配所有请求路径。https://%{HTTP_HOST}%{REQUEST_URI}: 将请求重定向到 “https://” + 当前域名 + 当前请求路径。[L,R=301]:R=301表示这是一个永久重定向,对SEO友好。L表示这是最后一条规则,处理完后停止。
第 2 步:配置 HTTPS (Port 443) 虚拟主机提供服务
现在,确保你的 HTTPS 站点配置正确,它将实际处理用户的请求。
编辑 default-ssl.conf 文件。
sudo nano /etc/apache2/sites-available/default-ssl.conf
确保该文件包含以下关键指令(大部分内容应该是默认存在的,你主要需要检查并添加 SSL 证书路径):
<IfModule mod_ssl.c>
    <VirtualHost _default_:443>
        ServerAdmin webmaster@localhost
        DocumentRoot /var/www/html

        # 如果有域名,可以取消注释并修改
        # ServerName your_domain.com
        # ServerAlias www.your_domain.com

        ErrorLog ${APACHE_LOG_DIR}/error.log
        CustomLog ${APACHE_LOG_DIR}/access.log combined

        # --- SSL 配置 ---
        SSLEngine on

        # 将下面的路径替换为你的证书文件的实际路径
        # 如果使用 Let's Encrypt, 路径通常在 /etc/letsencrypt/live/your_domain/
        SSLCertificateFile      /etc/ssl/certs/apache-selfsigned.crt
        SSLCertificateKeyFile   /etc/ssl/private/apache-selfsigned.key

        # 如果有证书链文件 (Chain File),也需要添加
        # SSLCertificateChainFile /path/to/your/chain.pem

        <FilesMatch "\.(cgi|shtml|phtml|php)$">
                        SSLOptions +StdEnvVars
        </FilesMatch>
        <Directory /usr/lib/cgi-bin>
                        SSLOptions +StdEnvVars
        </Directory>

    </VirtualHost>
</IfModule>
重要:
- 将
SSLCertificateFile和SSLCertificateKeyFile的路径替换成你自己的证书和私钥文件的路径。 - 如果你使用的是 Let’s Encrypt,
certbot会自动为你生成一个包含这些配置的文件,你可能只需要修改certbot生成的配置文件。
第 3 步:启用 SSL 站点并重载 Apache
-
启用默认的 SSL 站点 (如果尚未启用):
sudo a2ensite default-ssl.conf -
检查配置语法是否有错误:
sudo apache2ctl configtest如果看到
Syntax OK,说明配置没有语法问题。 -
平滑重载 Apache 服务以应用更改:
sudo systemctl reload apache2
现在,尝试通过浏览器访问 http://你的服务器IP或域名,应该会自动跳转到 https://你的服务器IP或域名。
方法二:使用 Certbot 自动配置 (最简单)
如果你使用 Let’s Encrypt 的 certbot 来获取证书,它可以为你自动完成重定向配置。
-
安装 Certbot 和 Apache 插件:
sudo apt update sudo apt install certbot python3-certbot-apache -
运行 Certbot:
sudo certbot --apache -
按照提示操作:
Certbot 会自动检测你的 Apache 配置文件中的域名。在获取证书的过程中,它会问你一个关键问题:Please choose whether or not to redirect HTTP traffic to HTTPS, removing HTTP access. - - - - - - - - - - - - - - - - - - - - - - - - - - - - - - - - - - - - - - - - 1: No redirect - Make no further changes to the webserver configuration. 2: Redirect - Make all requests redirect to secure HTTPS access. Choose this for new sites, or if you're confident your site works on HTTPS. You can undo this change by editing your web server's configuration. - - - - - - - - - - - - - - - - - - - - - - - - - - - - - - - - - - - - - - - - Select the appropriate number [1-2] then [enter] (press 'c' to cancel):在这里,选择
2并按回车。
Certbot 会自动修改你的 Apache 配置文件,实现和方法一同样的效果。这是最推荐给新手的做法,因为它减少了手动配置出错的风险。
总结
- 方法一 (手动修改) 让你更好地理解 Apache 的工作原理,对配置有完全的控制。
- 方法二 (使用 Certbot) 快速、简单且不易出错,特别适合使用 Let’s Encrypt 证书的场景。
无论哪种方法,最终目标都是让 80 端口的 VirtualHost 块负责重定向,而 443 端口的 VirtualHost 块负责提供网站内容。
希望这能帮到你!